Help! My Hatsan BT65 (and other models) does not cycle anymore!
You're ready for an afternoon of shooting. Everything is ready: The rifle is pressurized, the bullet trap has a card with a brand new taget, and the magazines are filled with your favorite ammunition.
But then! You are ready to shoot, you suddenly find out that the rifle does not want to cycle at all!
This can of course have a thousand and one causes, but today we are going to discuss (and solve) the 2 most common ones: The barrel o-ring and the magazine rotation.
What problem do I have?
First of all, we need to identify what the problem is.
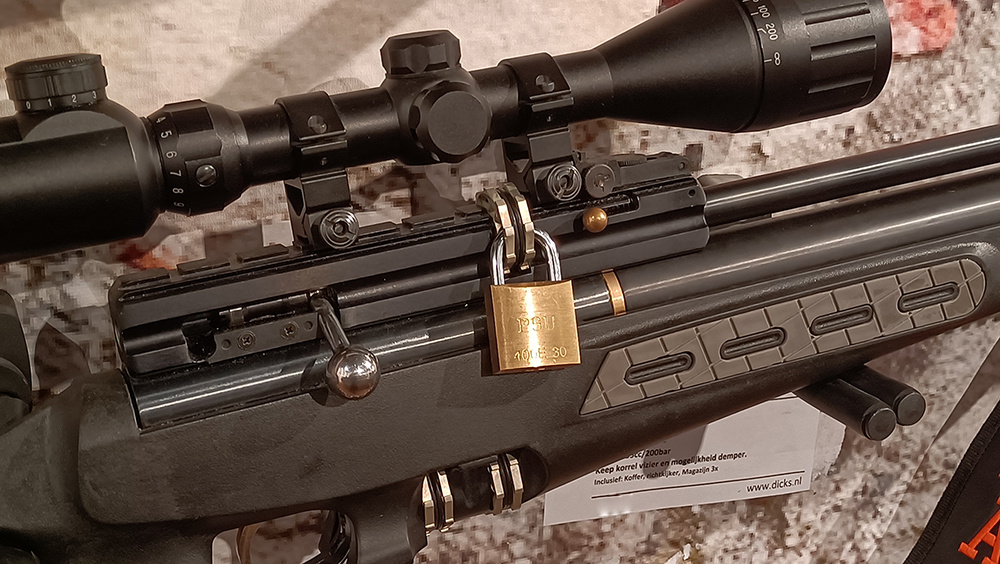
In this example we use the Hatsan BT65 SB Elite, but these solutions also apply to mechanically comparable rifles (eg Hatsan Hercules, AT-P1, AT-44-10, etc).
Problem 1: Missing barrel o-ring
Inside the barrel is an o-ring (2609 on this exploded view). This provides the airtight seal between the probe (part that pushes the bullets into the barrel) and the barrel.
This ring is essential for the proper functioning of the rifle.
This ring is available as a spare.
Symptoms:
- The magazine does rotate when cocked, but the bolt moves very heavily or not even fully forward.
This is because the pellets gets stuck in the recess for the o-ring. - When firing, air blows past the magazine to the sides.
This missing air can prevent the bullet from exiting the barrel. So be careful not to put multiple bullets in the barrel! - You don't see the ring. It is of course quite easy to determine by checking whether the ring is in the barrel.
Cause of this issue:
Usually this is due to lack of maintenance or simply old age of the o-ring.
It is essential with PCP air rifles to periodically grease this seal with a little silicone grease such as (for example) Hill NLGI2 or Abbey Silicone Gun Grease.
This can easily be done by greasing the probe and moving it back and forth along the raceway.
This really does not have to be done often and how often differs per rifle, but it is essential for long-term preservation.
How to fix this:
Fortunately, this one is easy to fix! To do this, go to Step 1.1 (don't skip 0.1).
Problem 2: Magazine rotation
The transporter is the part that rotates the rifle's magazine to index the next bullet for the barrel.
On the BT65, it slides under one of the teeth near the magazine and pushes it up.
It can happen that the trnsporter just doesn't have enough spring pressure or doesn't have the right finish to sit properly under the tooth of the magazine.
Cause of this issue:
We actually only see this occurring in 2 ways: A manufacturing defect or wear and tear.
With the first point it is of course best to visit the store where you purchased the rifle and then it will be fixed under warranty.
In the second case, it is easy to solve by adjusting or replacing the transporter.
How do we fix this:
This is a bit more technical, but still simple to fix. To do this, go to step 2.1 (don't skip 0.1).
Let fix this!
Step 0.1: Making sure the rifle is safe
We don't want holes in the wall or the back of the head, so we make sure we work safely.
For this we remove the pressure cylinder from the rifle or we depressurize the rifle is it's not removable.
With the BT65, simply unscrew it from the rifle.

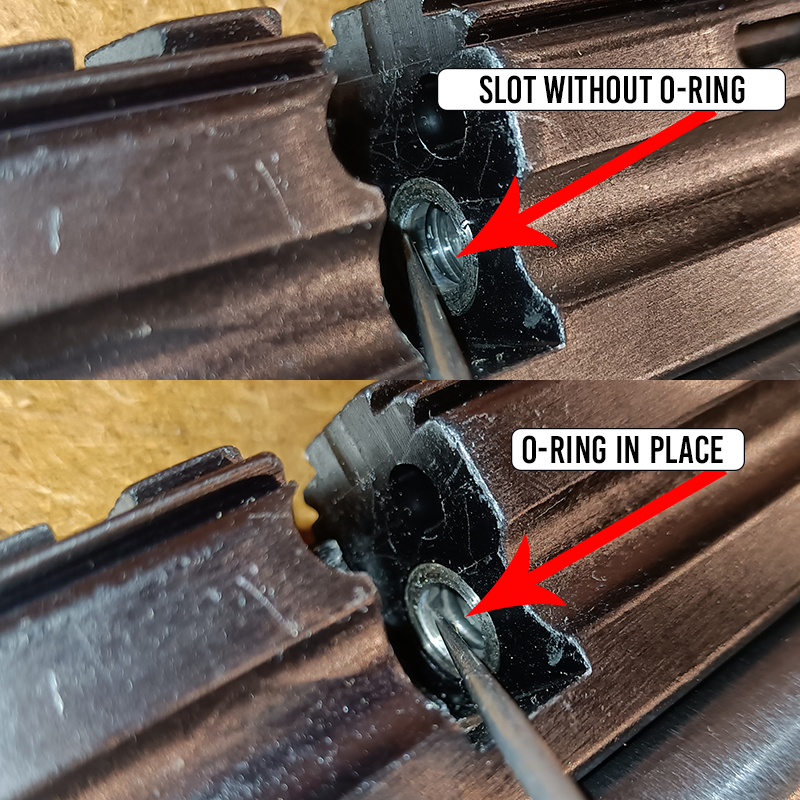
Step 1.1: Replacing the barrel o-ring
If the barrel o-ring is missing, this is where you start.
You can fiddle around it if you feel like it, but this is 10x easier when you remove the barrel.
To do this, remove the 2 Allen screws to the left (or on top if you have a .22) of the bolt housing and pull the barrel out of the rifle.

Step 1.2: Putting the o-ring back in the barrel
You can of course order this o-ring from us via the product page.
This is easiest with a hook tool, but can also be done with other thin (not sharp) tools.
First we grease the o-ring with some silicone grease. This ensures that the ring will last longer in the future.
Then we put it in the barrel (folding it in half makes this easier).
Then press it into the groove with the tool.

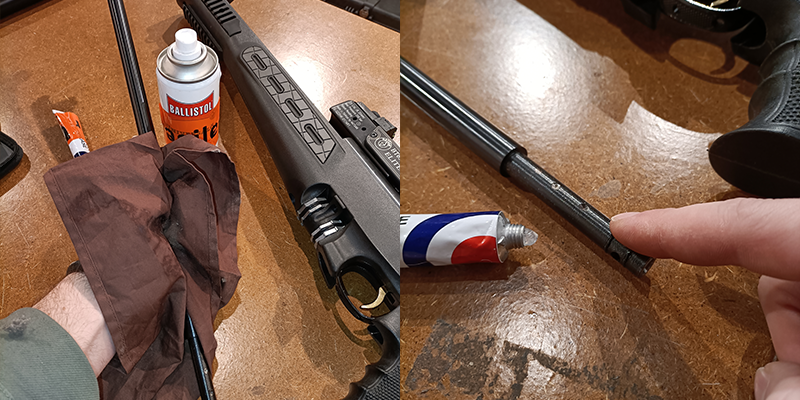
Step 1.3: Placing the barrel back into the rifle
Putting the barrel back is of course just step 1.1 vice versa.
First we wipe the barrel with some gun oil such as Ballistol or Brunox and we lubricate the o-rings around the barrel with some silicone grease.
Keep in mind the 2 dimples on the barrel. This is where the two allen screw index into. This is essential for aligning the transfer port.

Step 2.1: Fixing the transporter
If the transporter is not worn out (this is rare) then we only have to adjust it a bit.
For this we remove the side plate of the breechblock. It is held in place with 3 screws.
Note: make sure that the rifle is not cocked and use a suitable screwdriver for this.

Behind this plate is the mechanism that rotates the magazine.
The rear spring is mainly under tension. Loosen it carefully to prevent it from shooting away.

Step 2.2: Adjusting the transporter
We can take out the transporter (part 2632 on the drawing). This one has a slight bend.
The bend is the "little arm" of the transporter that grabs the magazine by the teeth.
We put the transport in a vise (preferably with some protection) and let this arm stick out.
![]()

Then we take a driving pin or a similar tool and a light hammer and tap the arm a little further out.
A little bit is enough. This allows the arm to get a better grip on the teeth of the magazine.
If the magazine does not rotate properly, you can always tap a little further.
Step 2.3: Placing the sideplate back
We wipe the parts with some gun oil and to replace the parts we can look at the pictures at 2.1.
When installing the side plate, we must take care that the spring of the magazine stop are aligned properly (parts 2642 and 633).
This part ensures that the magazine cannot turn back the wrong way.
When replacing, it can help to move the bolt back a bit so that the mechanism makes room for the plate.

That is it!
We can shoot again!
If you have any questions or additions about this? Don't hesitate to get in touch!
Comments
Be the first to comment...